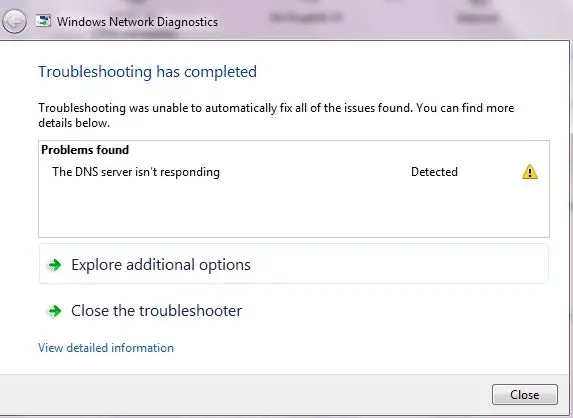
“Your computer appears to be correctly configured, but the device or resource (DNS server) is not responding.”
Or if it doesn`t give the above message, it might provide you with one that is closely similar to the error text below:
“The DNS server isn’t responding.”
If you`re experiencing this problem, you don’t need to worry, because the dns error is readily fixable.
“DNS server not responding error” is a common issue that occurs on many Windows computers.
The issue disallows a PC to access the Internet, regardless of the router.
So if you`ve seen any of these messages above, which often occur in Windows 7, Windows 8, 8.1, and Windows 10, it might be a problem that relates to the configuration of your computer, hence why the server is not responding.
Table of Contents
Fixing “DNS Server not Responding” Error
In this post, I will show you 6 ways to solve the DNS server not responding error, depending on what situation your PC is in.
It isn`t a must you try all the fixes below, work your way down the list until you bump into one that works for you.
It is usually as simple as fixing the dns cache.
How To Fix “DNS Server Not Responding” Error In Windows
- Solution 1: Fix the network address
- Solution 2: Reset DNS settings
- Solution 3: Update Your Network adapter driver
- Solution 4: Rollback the network adapter to an older version
- Solution 5: Enter MAC Address Manually
- Solution 6: Restart your Router or Modem
All the above fixes are very straightforward and easy to follow.
Let`s start from the basis.
Solution 1: Fix Network Address
First, the “DNS not responding” error might be a result of incorrect DNS server address. To correct the DNS server address, here is a step-by-step procedure to get it set back.
- Click on the Start button and key in Run to access the Run app. Alternatively, you can press the Windows logo key and R simultaneously to open the Run box directly.
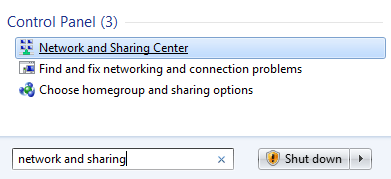
- Feed-in Control and hit the Enter button to open the control panel
- Navigate through to Network and Sharing Centre and click on it
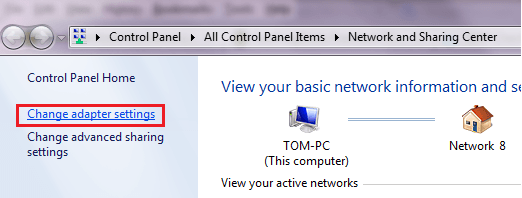
- On the Network and Sharing Centre windows, select the Change adapter settings on the top left.
Tip: You can quickly access this section by pressing Windows + R and then fill out “ncpa.cpl” without the quotes and press Enter.
-
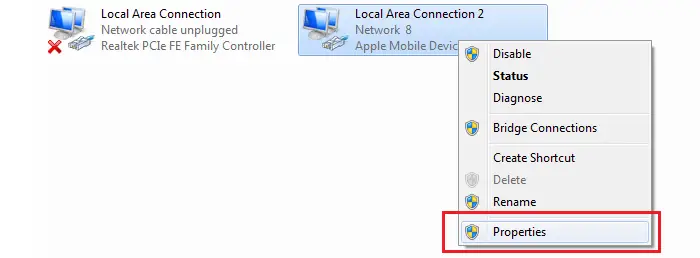
- Next, right-click on your network adapter (Local Area Connection, Ethernet, or Wi-Fi) and select Properties.
- Click on Internet Protocol Version 4 and hit the Properties button
- Set your default DNS to be Google’s DNS.
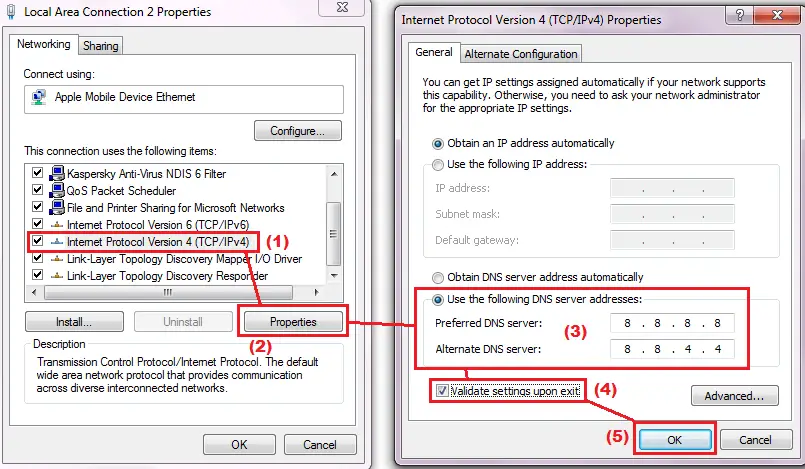
The preferred and alternate DNS server of Google’s DNS is 8.8.8.8 and 8.8.4.4, respectively.
If you don’t want to use Google’s DNS, you can use OpenDNS: OpenDNS address: 208.67.222.222 and 208.67.220.220 Or pick any of these third-party DNS servers.
They are also the best alternative DNS servers.
- Remember to check the box, “Validate settings upon exit” before clicking on the OK button.
Alternatively, you can fix the Network Address Manually. And here`s a straightforward guide on how to go about it:
- Open a Command Prompt by pressing Windows + R and type cmd or cmd.exe and then press Enter.
- In the Command Prompt window, type ipconfig /all and then press Enter.
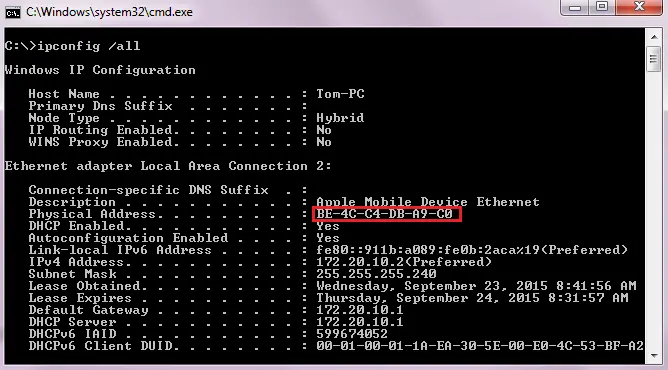
- You will see a physical address as the image above. Write it down!
- Next, go back to the Network and Sharing Center. Right-click on your adapter and choose Properties.
- Click on the Configure button and choose the Advanced tab.
- In the Advanced tab, find the Network Address and enter the physical address you have seen in the previous step, without dashes. Then click on the OK button.
For example, if your physical address is BE-4C-C4-DB-A9-C0, you will type BE4CC4DBA9C0.
- Finally, restart your Windows computer, and the problem will be solved.
Read Article: Fix Application Has Been Blocked From Accessing Graphics Hardware
Solution 2: Reset DNS Settings
Here is the second method to fix the DNS server not responding error on your Windows PC.
Use this solution when the first method can’t help you to solve the problem.
Tip: You can also use both methods to fix this issue. There will be no harm to your computer at all.
[full-related slug1=”dns_probe_finished_no_internet” slug2=”fix-dns_probe_finished_nxdomain-error”]
Step 1: Open a Command Prompt program by pressing Windows + R on your keyboard, type “cmd.exe” and press Enter.
Step 2:Perform all commands below, one by one:
- ipconfig /flushdns -> Enter
- ipconfig /registerdns -> Enter
- ipconfig /release -> Enter
- ipconfig /renew -> Enter
- netsh winsock reset -> Enter
Step 3: After finishing, you can reboot your computer. The problem should be gone after restarting.
